Loving is a journey with water and with stars,
with smothered air and abrupt storms of flour:
loving is a clash of lightning-bolts
and two bodies defeated by a single drop of honey.
from Love Sonnet XII by Pablo Neruda
with smothered air and abrupt storms of flour:
loving is a clash of lightning-bolts
and two bodies defeated by a single drop of honey.
from Love Sonnet XII by Pablo Neruda

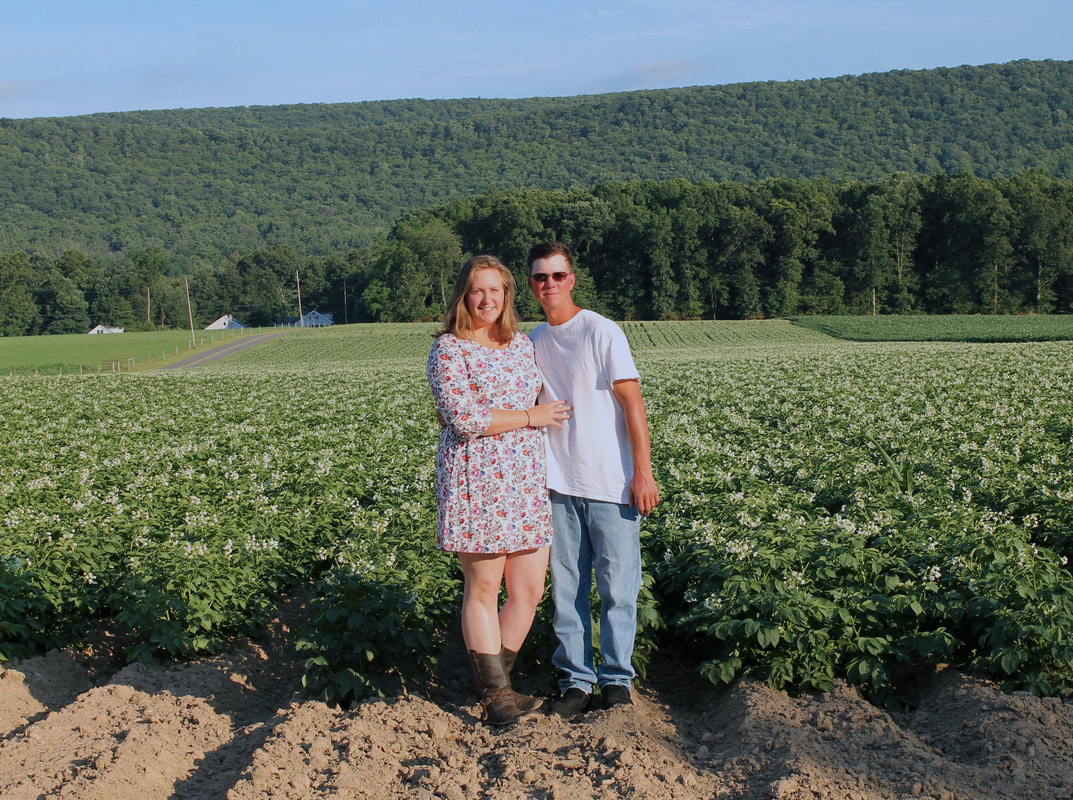
I recently came home from a trip to New York City (which I will post about very soon). The trip was significant for many reasons, but for one in particular. I stopped yearning for New York.
The chaotic energy pulsing from every corner, the endless options of shops and cafes, the honks and whistles and yelps and buzzing of electricity, the ever changing and the ever constant, the roars and rumbles, the quickening steps, bristling against the air, against the noise as you plunge into the street. The fullness of it all, seemingly ready to burst at the seams and then suddenly lull and murmur around the slightest turn of a corner, a softening and then a gem amongst the ravages of urban wilds. A place to sit. A moment among millions.
I stopped yearning but in no way did I stop loving. It is a sacred feeling to love something without yearning for it anymore. To be near it, in it and yet let it go with ease. To catch a glimpse of nostalgia and smile within yourself as it passes by. I am grateful for that feeling.
When I left New York, there was a part of me that felt like I had chosen the wrong door. I remember lying awake at night after moving from one coast to another and edging on panic as my brain shuffled through all that I had left in the city that never sleeps. But now I know that I had to be ripped from it so that I could leave it.
I had to because if I had never left, I would not have found home in the heart of my farmer.
 |  |
This recipe was a community pick on Food 52!
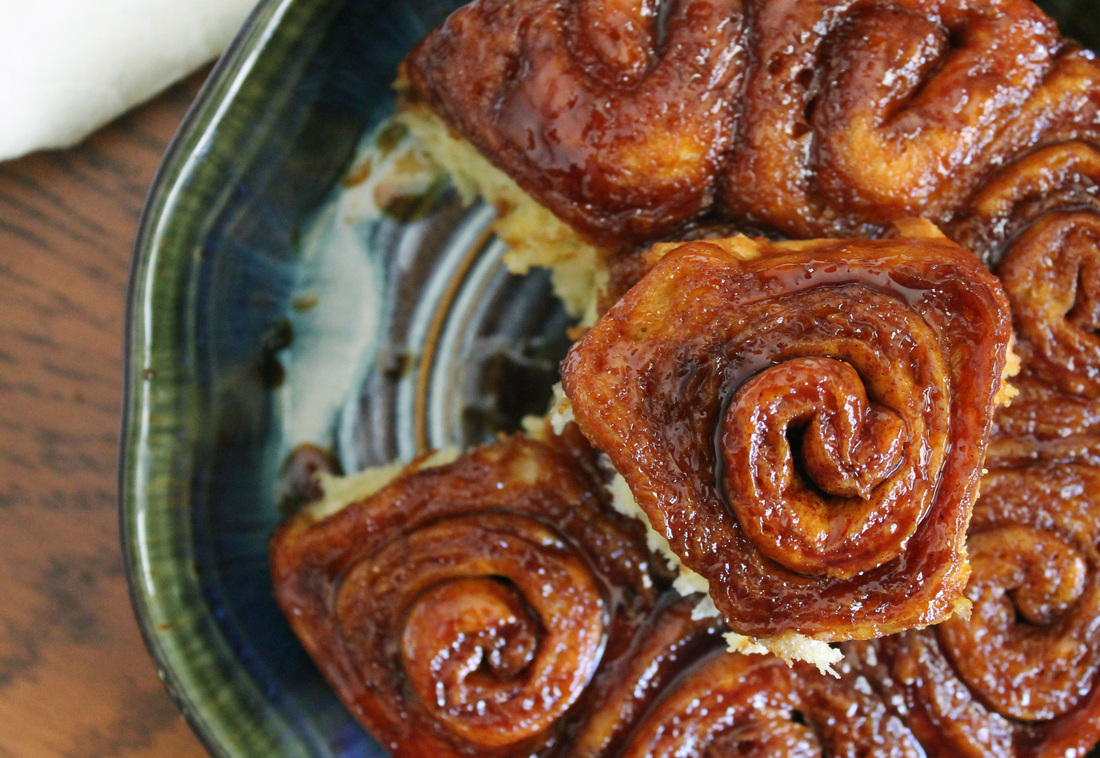
Buttermilk & Honey Buns
Makes 32 small buns
(Dough recipe adapted from King Arthur Flour)
Keep in mind you don't have to bake all 32 buns at once. The dough can be divided up into 4 -1 pound portions and what you do not use right away can be refrigerated for up to 3 days or frozen until ready to use.
If you freeze the dough, let it thaw (covered) in the refrigerator overnight before use. You can also pre-assemble the buns, cover them tightly and freeze them. Thaw them overnight in the refrigerator before use. If you freeze either the dough or pre-assembled buns, leave yourself some extra time for them to rise before baking, depending on how warm your kitchen is.
Another option is to assemble the buns completely, cover and refrigerate them for up to 3 days until you are ready to bake. Leave yourself some extra time for them to rise before baking, depending on how warm your kitchen is. A nice way to speed up the rising process is to place the covered buns in an oven (that is turned off, obviously!) on the middle rack with a pan of hot water on the rack beneath them. A little facial before they go to the tanning bed...? OK, not the best comparison :)
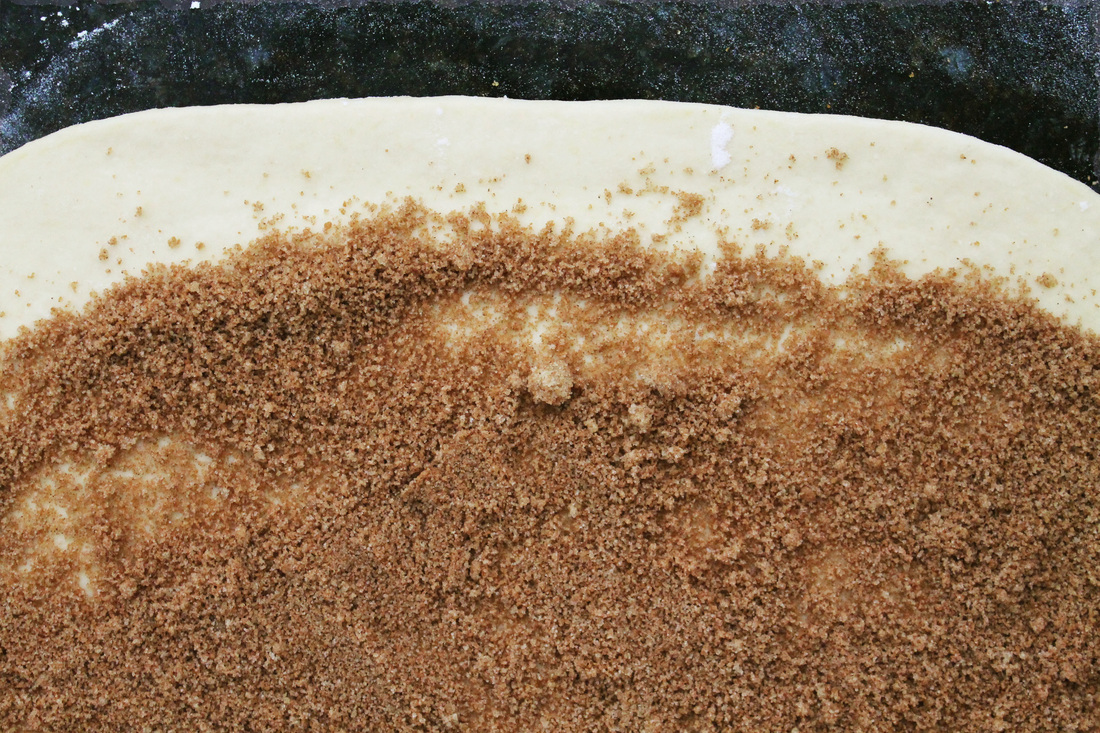
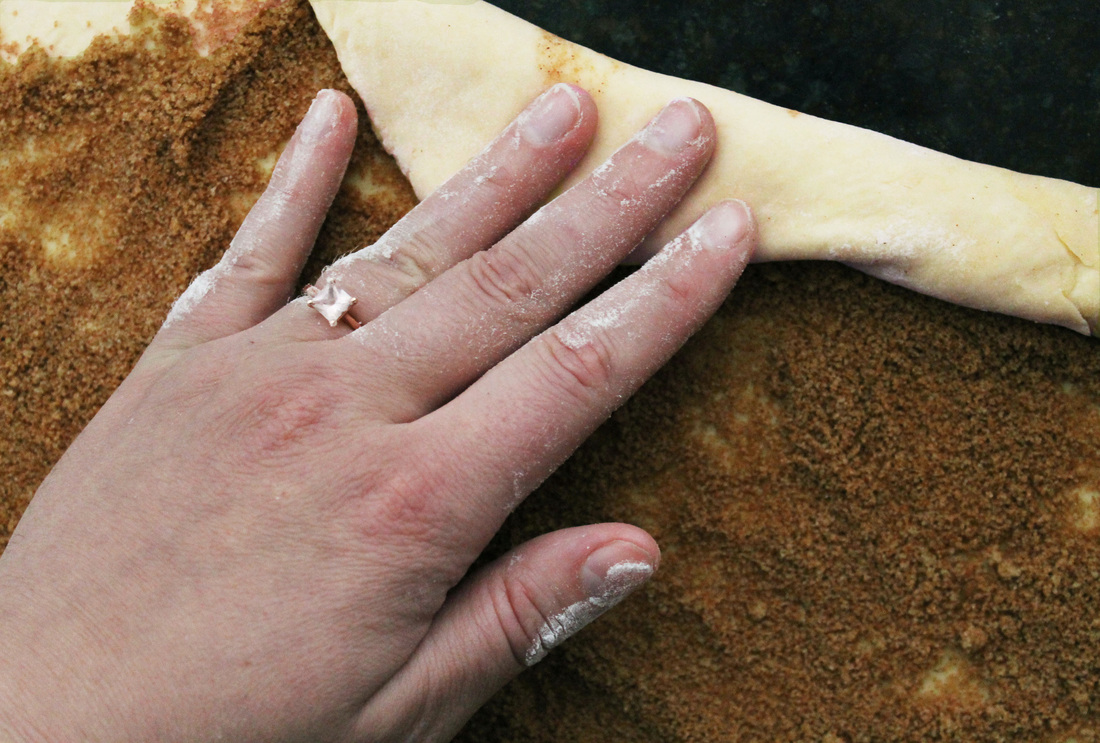
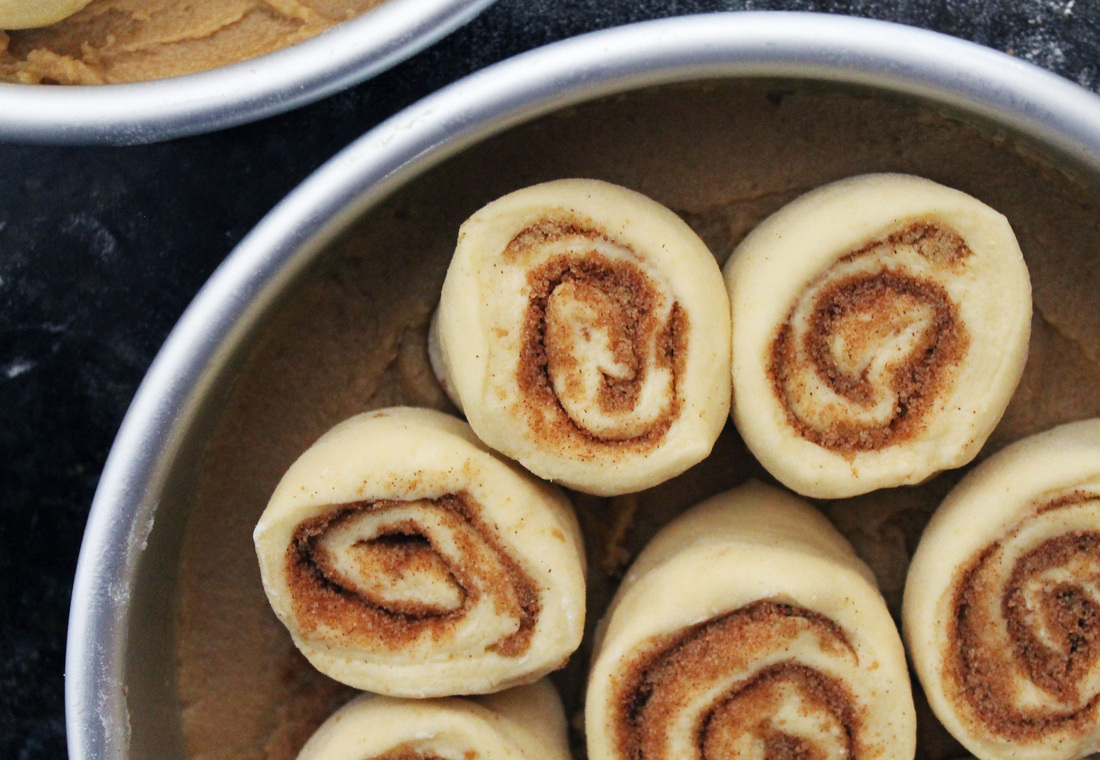
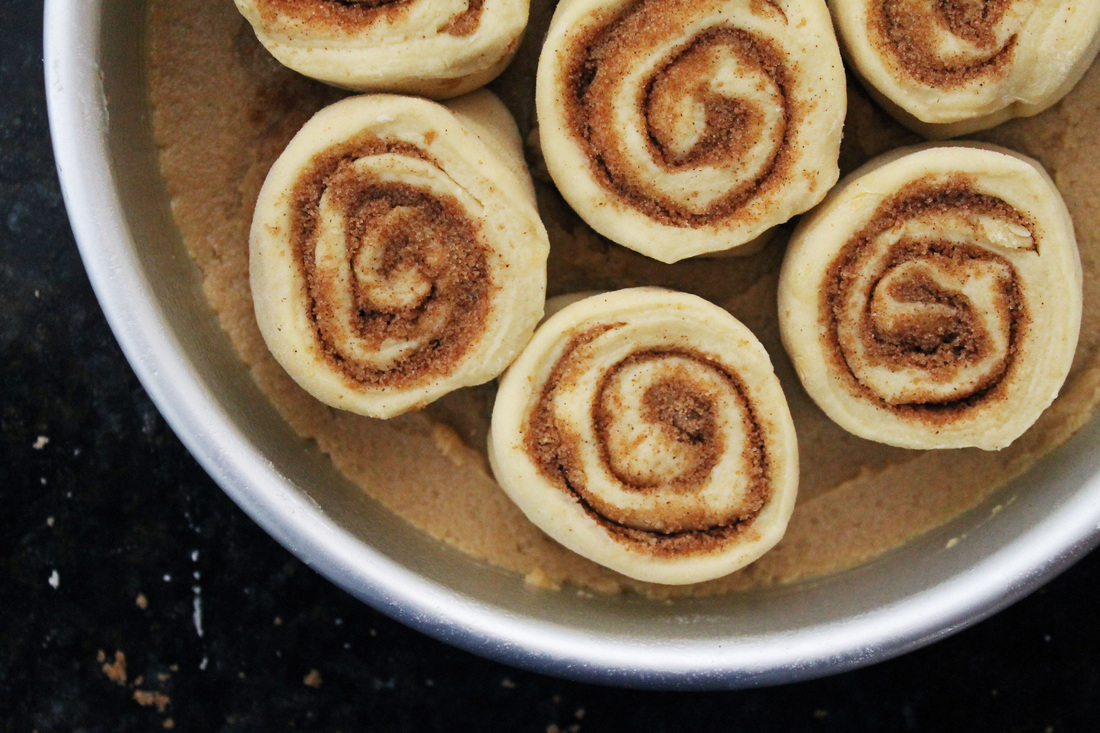
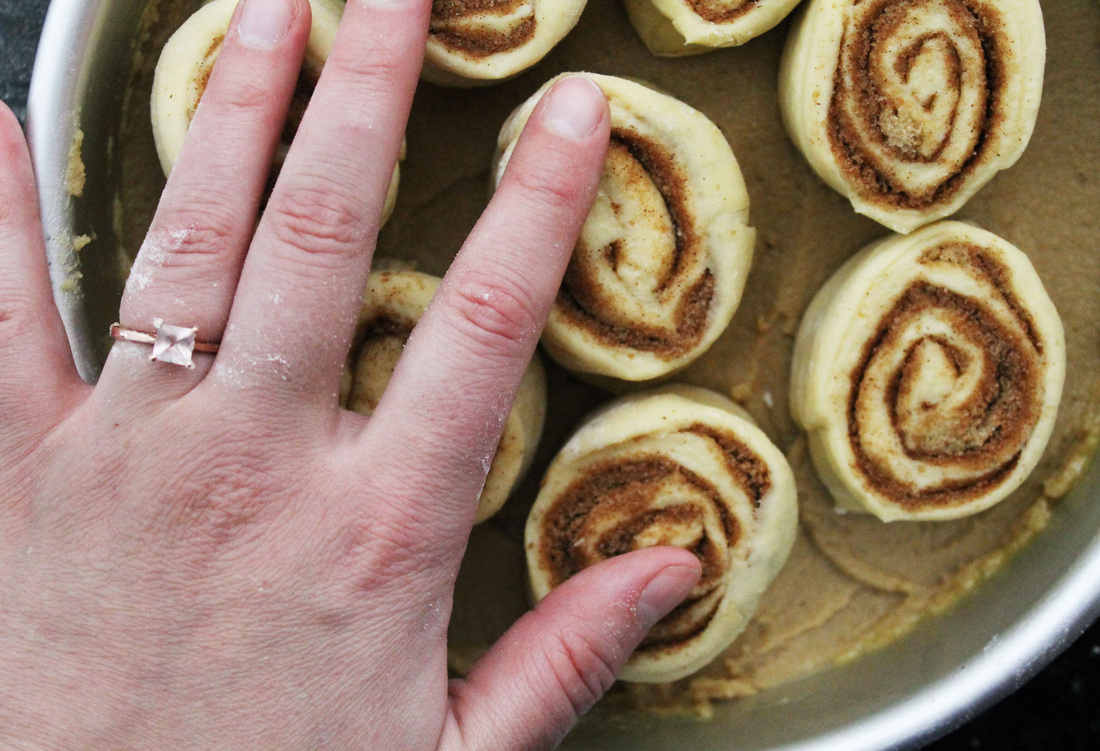
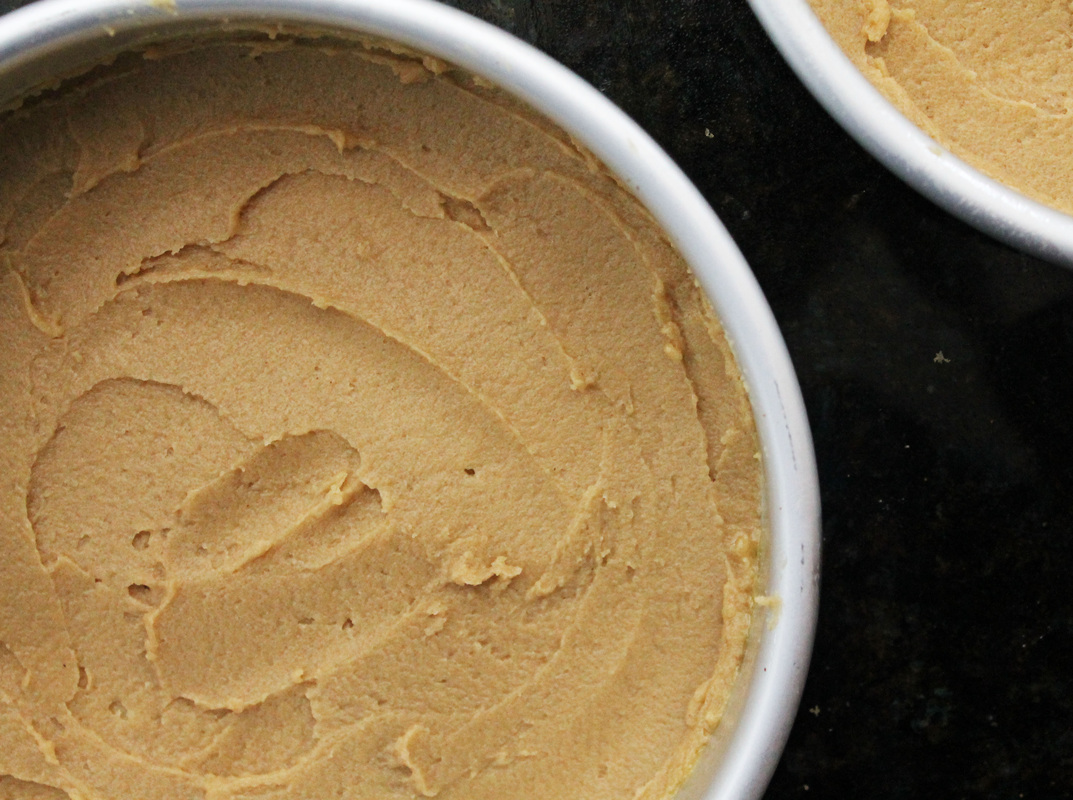
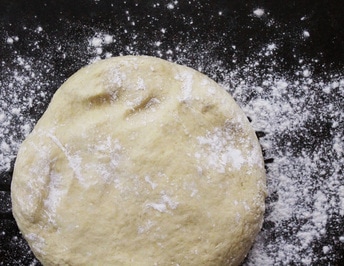
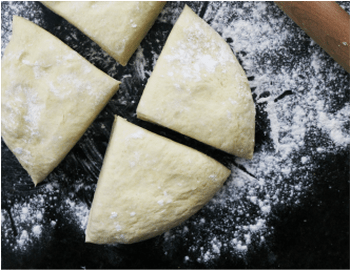
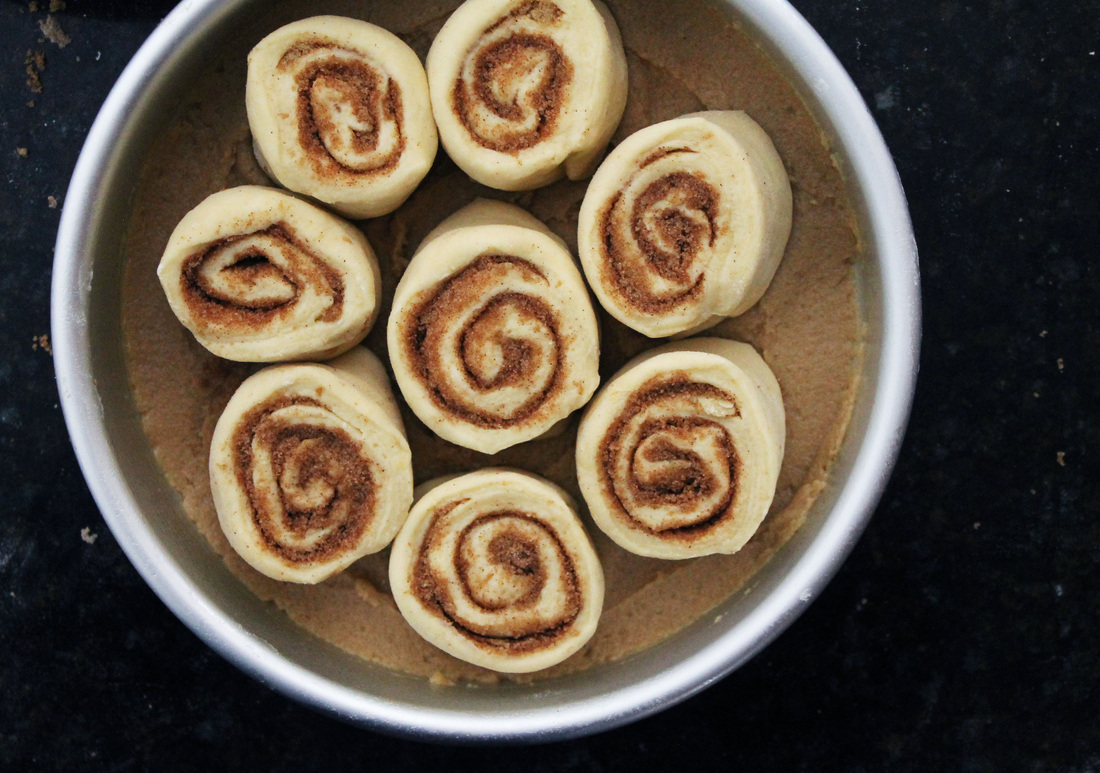
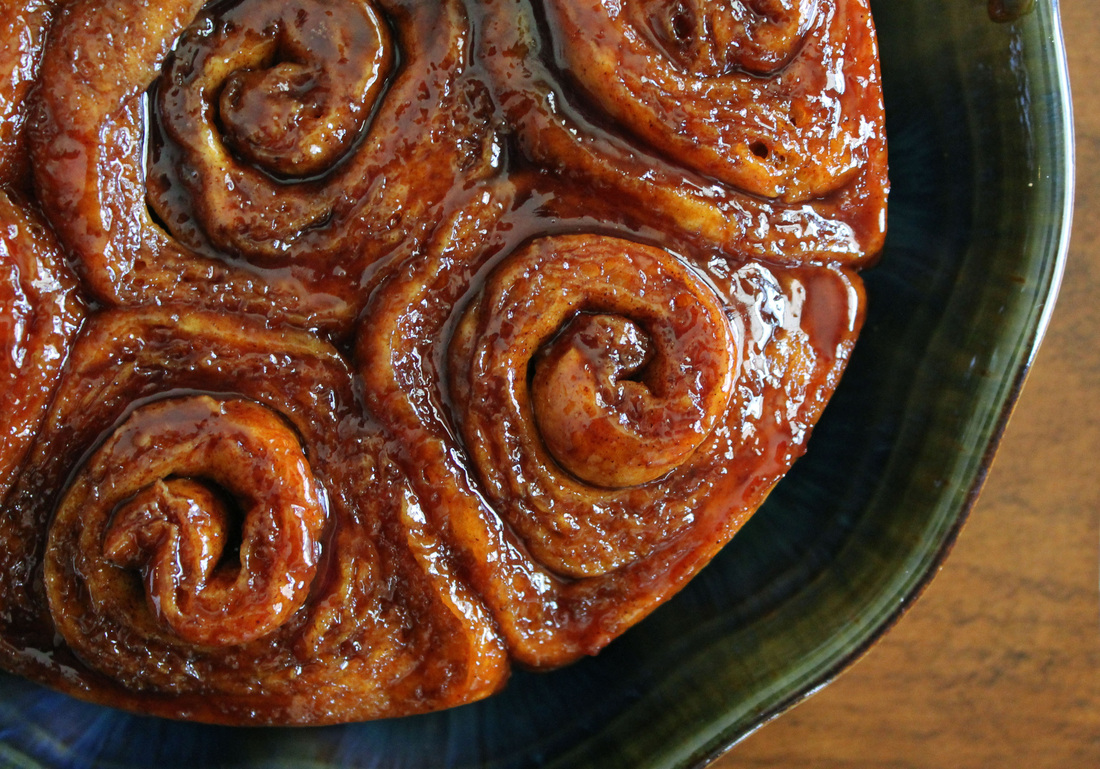
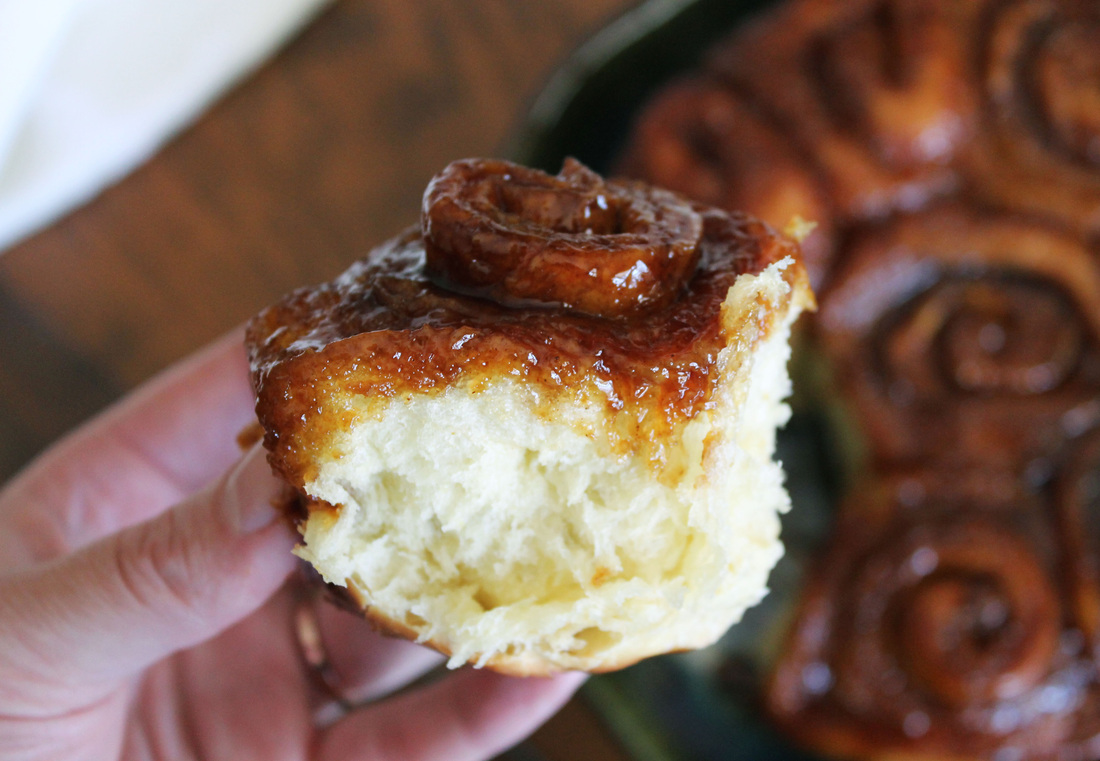
| For the dough 33 oz (936 g) all purpose flour 1 tbsp (18 g) kosher salt 1 1/2 tbsp active dry yeast 14 oz lukewarm buttermilk, shaken well 200 g (about 7 oz or 4 large) eggs 6 oz honey 4 oz unsalted butter For the filling 2 cups (15 oz) light or dark brown sugar 3 tbsp ground cinnamon For the topping 12.5 oz light or dark brown sugar 5.75 oz unsalted butter, room temperature 3 oz honey 0.30 oz baking soda 3 oz water | For the dough Melt the honey and butter together and let cool a bit. In the large bowl of a stand mixer fitted with the dough hook attachment, combine all of the ingredients in the order listed. On the lowest speed, mix until everything is just combined to form a sticky dough. You can also do this by hand easily because you don't want to knead the dough, just mix it. Let the dough rest in a lightly oiled bowl covered with a towel for about 2 hours at a cool room temperature. At this point, you can assemble and bake the buns, but the dough really gains a lot by having some rest time in the refrigerator overnight. It is also a little easier to work with the following day after refrigeration. You can pre-assemble the buns before you cover them and put them in the fridge or assemble them the following day. For the filling Combine the brown sugar and cinnamon. Mix well. For the topping In the bowl of a stand mixer fitted with a paddle attachment, beat the butter and brown sugar until light and fluffy. Add the honey and baking soda and beat until combined. With the mixer running, slowly add the water to form a loose paste. Keep the smear at room temperature. For the assembly Depending on how many buns your are baking at once, you can bake them in many different sizes of pans. If you are only baking 8 at a time, an 8" cake pan works well. Just make sure the sides of the pan you use are only about 1 1/2" high. In whatever pan you choose, lightly grease it with butter or spray and then spread about 6 or 7 oz of smear on the bottom of the pan for every 8 buns you bake. Feel free to sprinkle some toasted nuts on the smear if your heart desires. When you are ready to bake the buns, remove the dough from the refrigerator (if you let it sit overnight) and divide it into approximately 4 - 1 pound portions. Each portion will yield 8 buns so at this point, you can bake as many buns as you'd like.* Let the dough warm up for about 30 minutes if it has been in the fridge. Lightly flour your workstation and roll each 1 pound portion into a rectangle that is approximately 12" x 15". Each 1 pound portion of dough will need about 1/2 cup of filling. Spread the filling evenly over the rectangle of dough, leaving about a 1" border all around. Beginning in the upper right or left hand corner, roll the rectangle up like a jelly roll. You want the log to be snug but not too tight. When you reach the bottom edge, pinch it to seal the filling inside. Divide the log into 8 equal buns and place them facing up in the pan with smear. Pat them down lightly so they are touching. Cover the buns with a clean towel and let them rise in a warm spot for around1 1/2 - 2 hours, depending on how warm your kitchen is. The buns should about double in size before you bake them. Near the end of the rising time, preheat a conventional oven to 350 F. Place the pan(s) of buns on a sheet tray or place one underneath the buns on a separate rack just in case - the topping has the potential to get bubbly! Bake for about 25-30 minutes until a tester inserted into the center of a bun comes out without raw dough on it. Using your oven mitts, immediately invert the buns into a clean pan or plate. Let them cool slightly and serve. *The dough you will not use right away can be refrigerated for up to 3 days or frozen until ready to use. If you freeze the dough, let it thaw (covered) in the refrigerator overnight before use. You can also pre-assemble the buns, cover them tightly and freeze them. Thaw them overnight in the refrigerator before use. If you freeze either the dough or pre-assembled buns, leave yourself some extra time for them to rise before baking, depending on how warm your kitchen is. Another option is to assemble the buns completely, cover and refrigerate them for up to 3 days until you are ready to bake. Leave yourself some extra time for them to rise before baking, depending on how warm your kitchen is. |
 RSS Feed