
In my mind, I equate being able to maintain a sourdough starter with being a better person. I'm not sure why, because I know plenty of asshole bakers. But I know more good eggs than bad, so I will continue to equate skilled bread baking with shamanism. One reason for this sourdough pedestal, is because I have yet to successfully maintain a sourdough culture of my own for a period of time longer than a few months. It makes me wonder about having children. The exact question that floats through my mind sometimes is, "Crikey, if I can't maintain a starter, how I am going to care for a child?!" You heard that right. It's a very real source of shame for me. If there was a support group, like Crumb Killers Anonymous or FFA (Fermentation Failures of America), I would attend meetings. "Hi my name is Sam, and I am a bad bread baker."
Despite setbacks, I'm going to keep trying. The quiet, almost monastic feel on the farm lately is an ideal backdrop for starting a starter...again. And this time, I have fresh, locally milled flour to help me out. I am amazed at the difference. Using flour that has not been sitting on a grocery store shelf for who knows how long creates an active starter much earlier in the game. So in addition to a "recipe" of sorts, below are a list of personal observations and sources about starting and maintaining a sourdough starter that I've found helpful and interesting to read.
My Observations
1. I think the most encouraging and discouraging statement I've read in all of my bread research is "Bread baking is as much of an art as it is a science." Someone's proven method may not work so swimmingly for you. It's really all about trial and error. There are a seemingly infinite number of factors that can affect your starter, so don't put yourself down if a certain method isn't working. Try another.
2. A starter is a living thing (or more accurately, a community of many living things!) and therefore requires you to develop a somewhat personal relationship with it. I think that statement highlights an interesting disconnect between people and food in this country. Food is so easily accessible to many of us and therefore, it becomes less precious. When we don't have to work for it, it has less value. I think that's why many people find sourdough bread baking so empowering because a good loaf of bread doesn't emerge from a vacuum. It is the result of a relationship that requires consistent energy to maintain. At first, feeding and checking on your starter may seem like yet another thing to remember in an already busy schedule. Write yourself a colorful post-it note and stick it to a surface that you come into contact with multiple times a day. It will help keep that task fresh in your mind and will eventually just become part of your daily dance.
3. Find a fellow baker, preferably someone with a bit more experience than you. Conversations with them will re-spark your interest and desire to bake if it's waning, and you will undoubtedly pick up a few tips along the way. Reading about what other bakers are doing is also extremely helpful and inspiring.
4. If you are able, use flour that has been freshly milled. Sometimes you don't know what you're getting on a grocery store shelf in terms of freshness. We are fortunate to have a flour mill just down the road. Often times small, independently owned health food stores stock local flour that is more likely to have been milled fairly recently. It's not a necessity and don't break the bank doing it. But I noticed a real difference in activity from my starter when I started using fresher flour.
5. Temperature. Temperature. Temperature!!!! It is everything. Think about what season it is, what temperature is it outside. During colder months, your starter will benefit from warmer water during a feeding. In addition, a colder house will greatly affect your starter's activity level. We keep a fairly warm house, but I still keep my starter in a little cabinet directly above the fridge. Appliances like a refrigerator exude a surprising amount of heat, so take advantage of that. During the winter, starters may also benefit from more than one feeding a day, if you don't already do so. 72-75 degrees F ambient temperature is ideal.
Reading Material
King Arthur Flour's sourdough starter tutorial
The Ktchn's sourdough starter tutorial
The Bread Builders: Hearth Loves and Masonry Ovens
Tartine Bread
Inspiration
Tara Jensen + Smoke Signals Bakery
Rich Orris's baker's formula calculator
Blue Oven Bakery
LeFevre Bakery
Berkshire Mountain Bakery
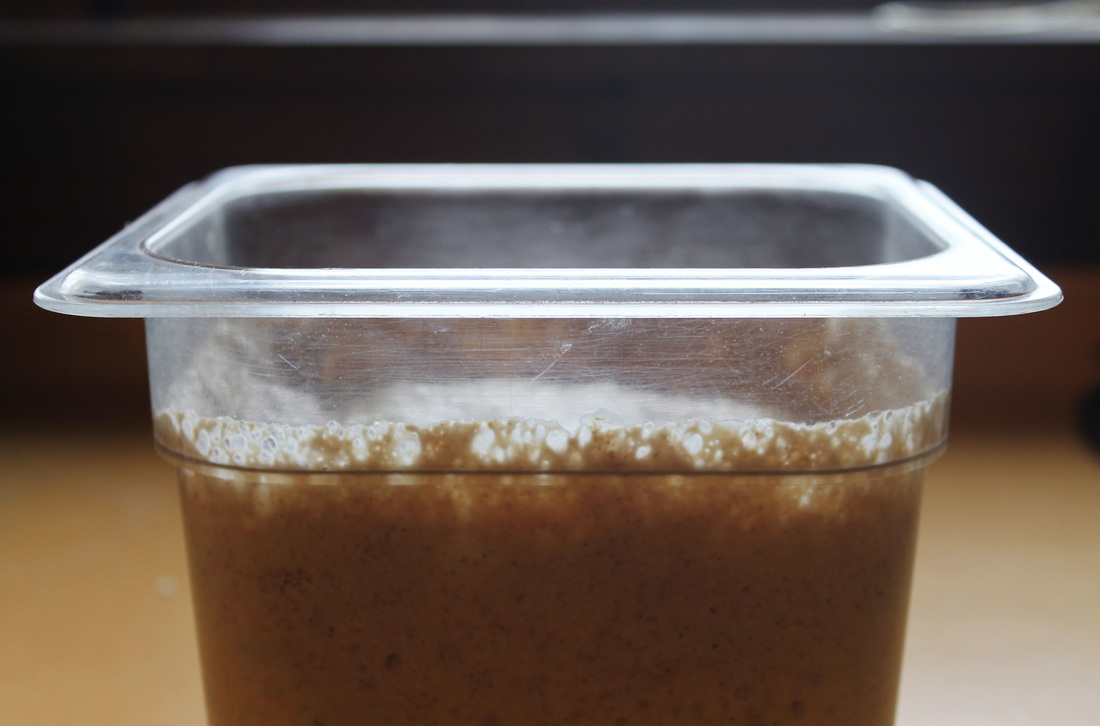
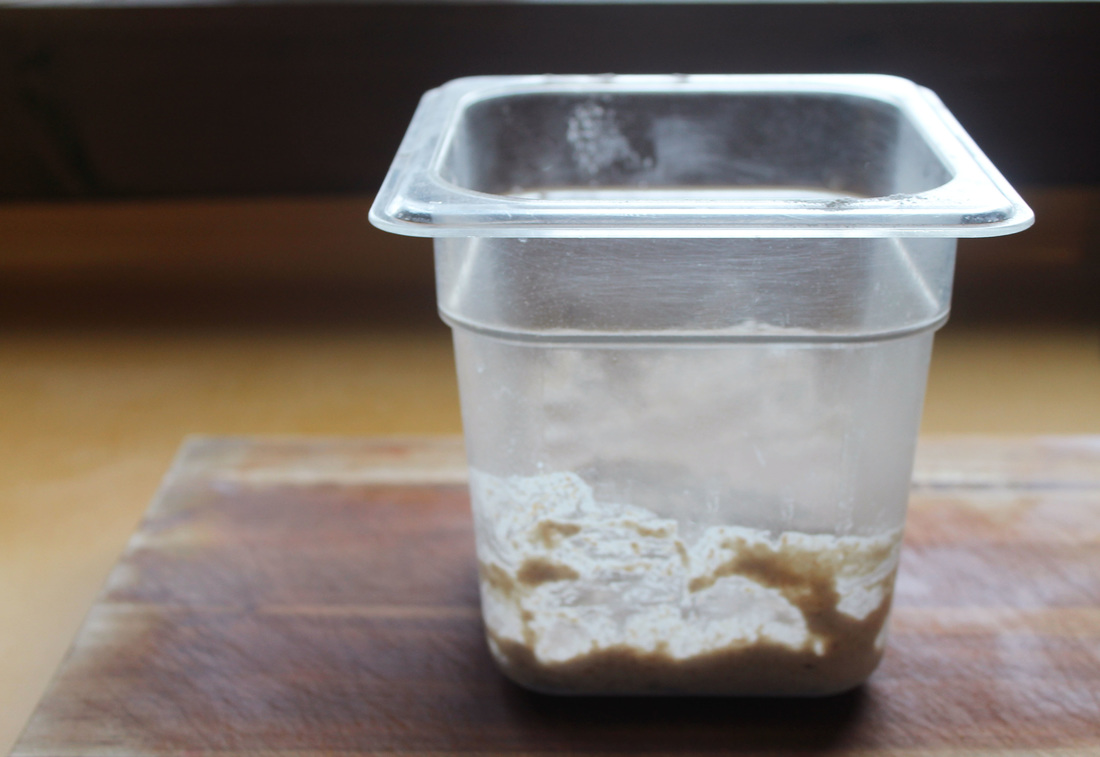
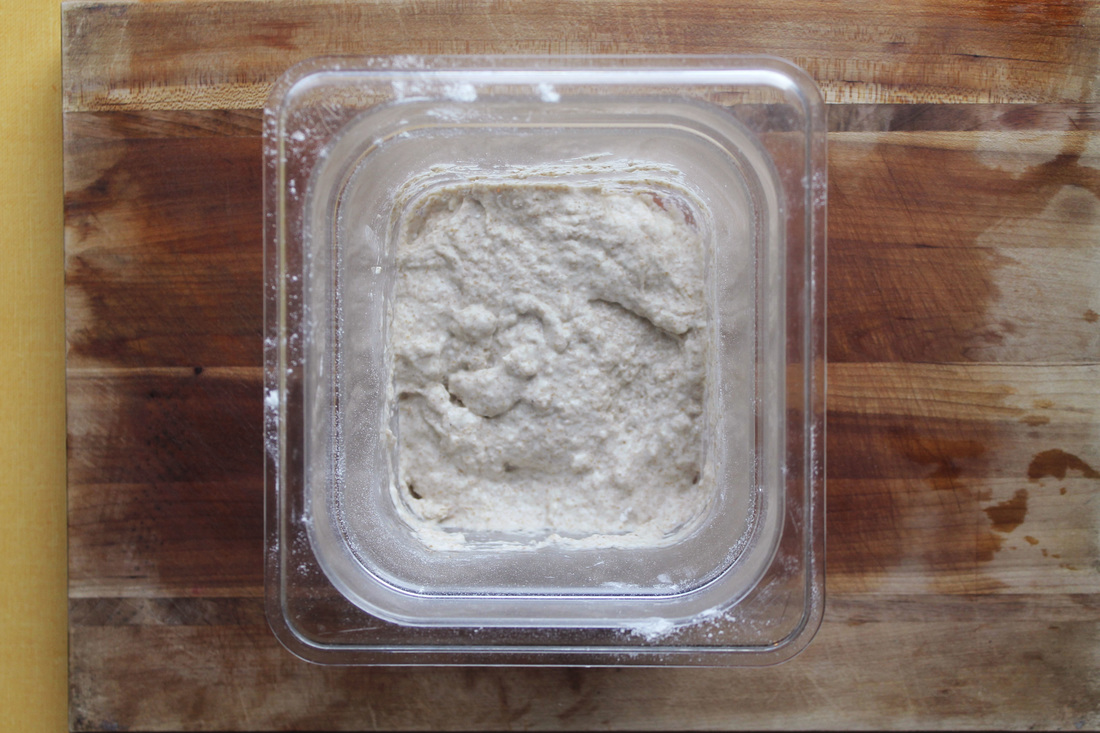
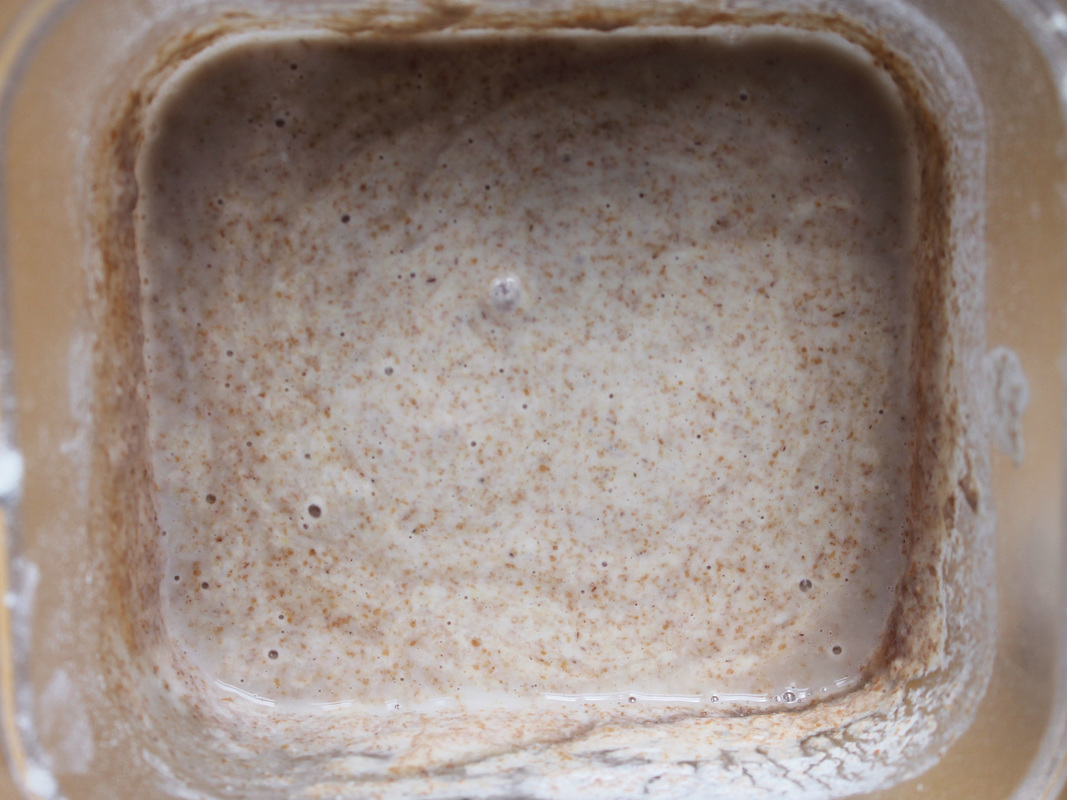
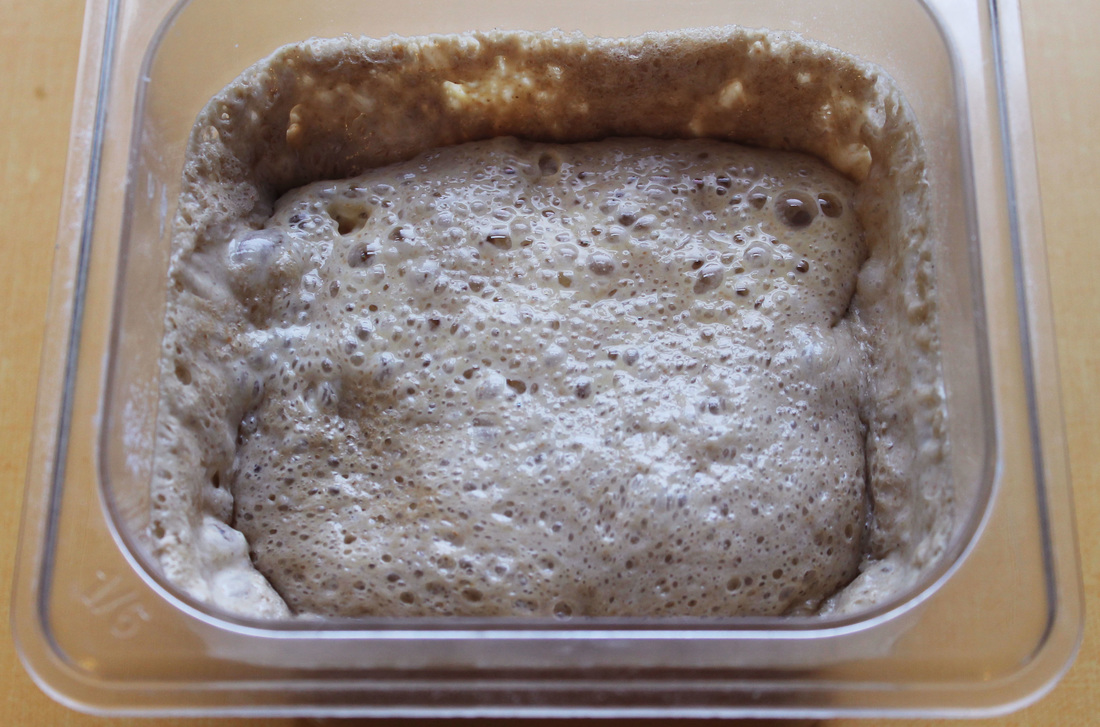
Basic Sourdough Starter
| Ingredients White bread flour Whole wheat bread flour Water | Method For convenience, make a bulk mix of half white bread flour and half whole wheat bread flour to use for feedings. 2 1/2 pounds of each, totaling 5 pounds of flour works well. Day 1 In a container that will hold heat well, such as high grade plastic or glass, combine equal parts flour and water: 4 ounces of flour mix and 4 ounces of water. The water should ideally be 78 - 80 degrees F. But if your house is very cold, you can use up to 90 degree F water. Mix the flour and water until a thick, lump free batter forms. Cover the container with a cloth and let is sit in a dark, warm spot for at least 24 hours. Day 2 Check your starter around the same time you made it yesterday. Ideally there should be a few bubbles and the starter should smell yeasty and slightly sweet. Feed your starter with the same equal parts of flour and water (4 oz: 4oz), mix to combine, cover and let sit again. If the starter doesn't seem very active, let it sit another day before feeding. Day 3 Your starter should be dotted with bubbles, maybe even foamy and visibly aerated. The smell will be more acidic. Feed it again with equal parts flour and water, stir, cover and let it be for another 24 hours. Day 4 When you check your starter today, it should be even looser than the day before, webbed with more bubbles, frothier and more acidic in smell. There may even be signs that it rose and fell overnight. Feed it the usual equal parts flour and water, stir, cover and let is sit another day. Day 5 Your starter should be dramatically foamy and webbed with bubbles, or show signs that it doubled in bulk and fell since you check it last. When you stir the starter, it will feel more liquid-like. At this point, bulk feeding is over. From now on, discard about half of the starter, and feed it the usual equal parts flour and water. Stir, cover and put it to bed. Day 6 The starter should look similar to the day before, with lots of vigorous activity. You can bake today if you'd like. After using some of the starter to bake with, be sure you feed the remainder, stir, cover and put away until tomorrow. Day 7 and Beyond If you plan on baking multiple times a week, continue to use what you need of the starter, and then feed it equal parts flour and water as usual. If you are only going to bake with it intermittently, cover your starter tightly with plastic wrap or a fitted lid and store it in the fridge. Once a week, remove the starter to feed it by discarding half, feeding equal parts flour and water, then leaving it out overnight before putting it back in the fridge. It will give the yeast some time to recuperate. |
 RSS Feed